Getting started with Okteto Divert
Divert allows you to create Development Environments that include only the services you are actively working on while leveraging a shared environment for all other microservices. This approach significantly reduces infrastructure costs and complexity, especially in large environments.
In this tutorial, you'll learn how to use Okteto Divert to set up a Development Environment that contains only the services you are actively working on. All other services will automatically fall back to a shared ephemeral environment. You can find the code for the sample app we work with for this tutorial here.
Prerequisites
- Access to an Okteto instance
- Okteto CLI installed and configured
Step 1: Deploy the shared environment
We will use the movies app to illustrate divert as part of your Development Environment. To begin, create a Namespace named staging on your Okteto instance. This is where our shared environment will run.
okteto namespace create staging
Then, deploy the Movies app:
git clone https://github.com/okteto/movies-catalog
cd movies-catalog
okteto deploy
The movies-catalog application is composed of three microservices: Frontend, Catalog, and Rentals. Each service is defined in a dedicated repository and deployed together using the dependencies feature of the Okteto manifest.
This is what the application looks like:
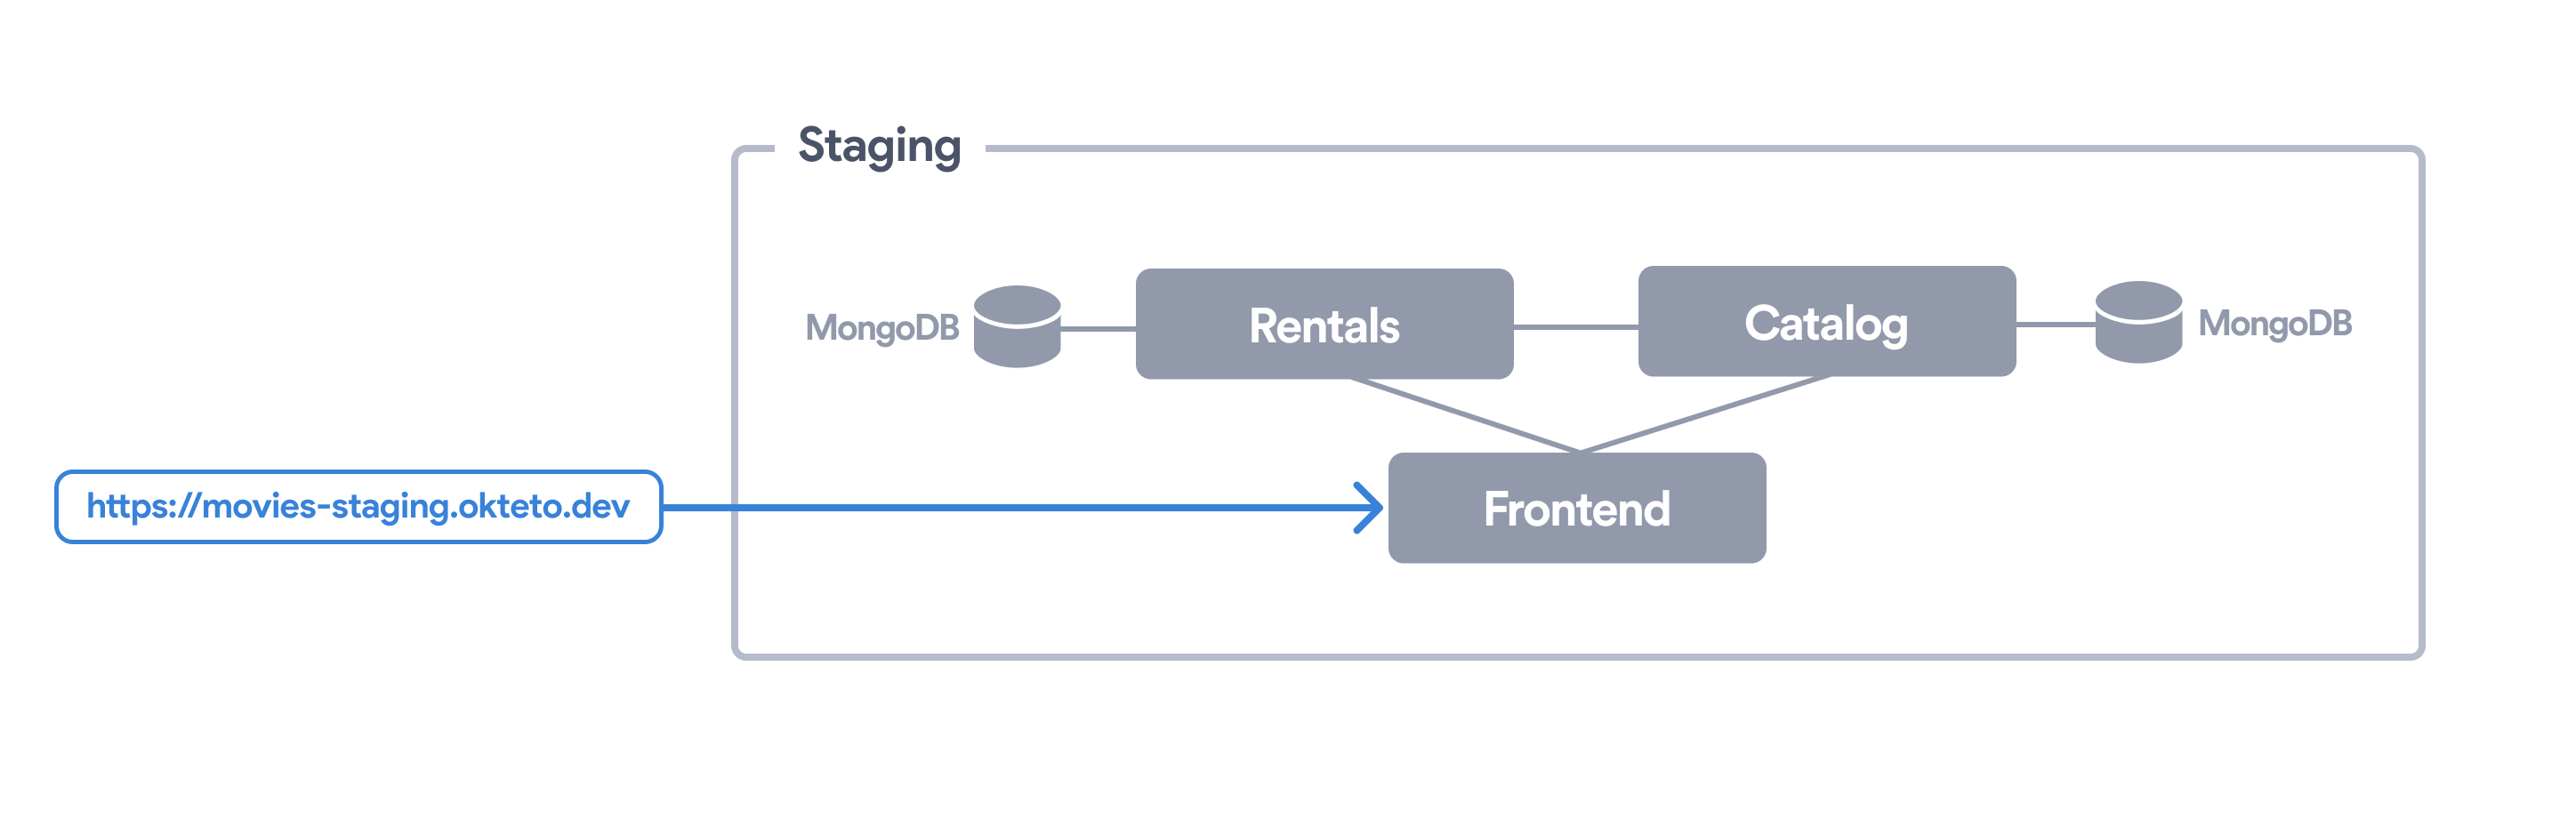
After a few seconds, the application will be built and deployed in the staging service. Feel free to interact with it to familiarize yourself with it. Rent one or two movies.
Step 2: Deploy your personal Development Environment
A key advantage of divert is that you only need to deploy the services you are actively working on in your Namespace, rather than the full application. For the purpose of this tutorial, we are going to work on the rentals service.
First, switch back to your personal Namespace (replacing cindy with your Okteto username):
okteto namespace cindy
Then, deploy the Rentals service of the Movies app:
git clone https://github.com/okteto/movies-rentals
cd movies-rentals
okteto deploy
While the application deploys, let's take a look at the deploy section of the Okteto manifest:
deploy:
  commands:
    - okteto deploy -f mongodb-compose.yml
    - helm upgrade --install rentals chart --set image=${OKTETO_BUILD_RENTALS_IMAGE}
  divert:
    namespace: staging
The deploy section tells Okteto to deploy the rentals service and database. The divert key tells Okteto to divert traffic to the staging Namespace for all the other services.
Step 3: Interact with the application
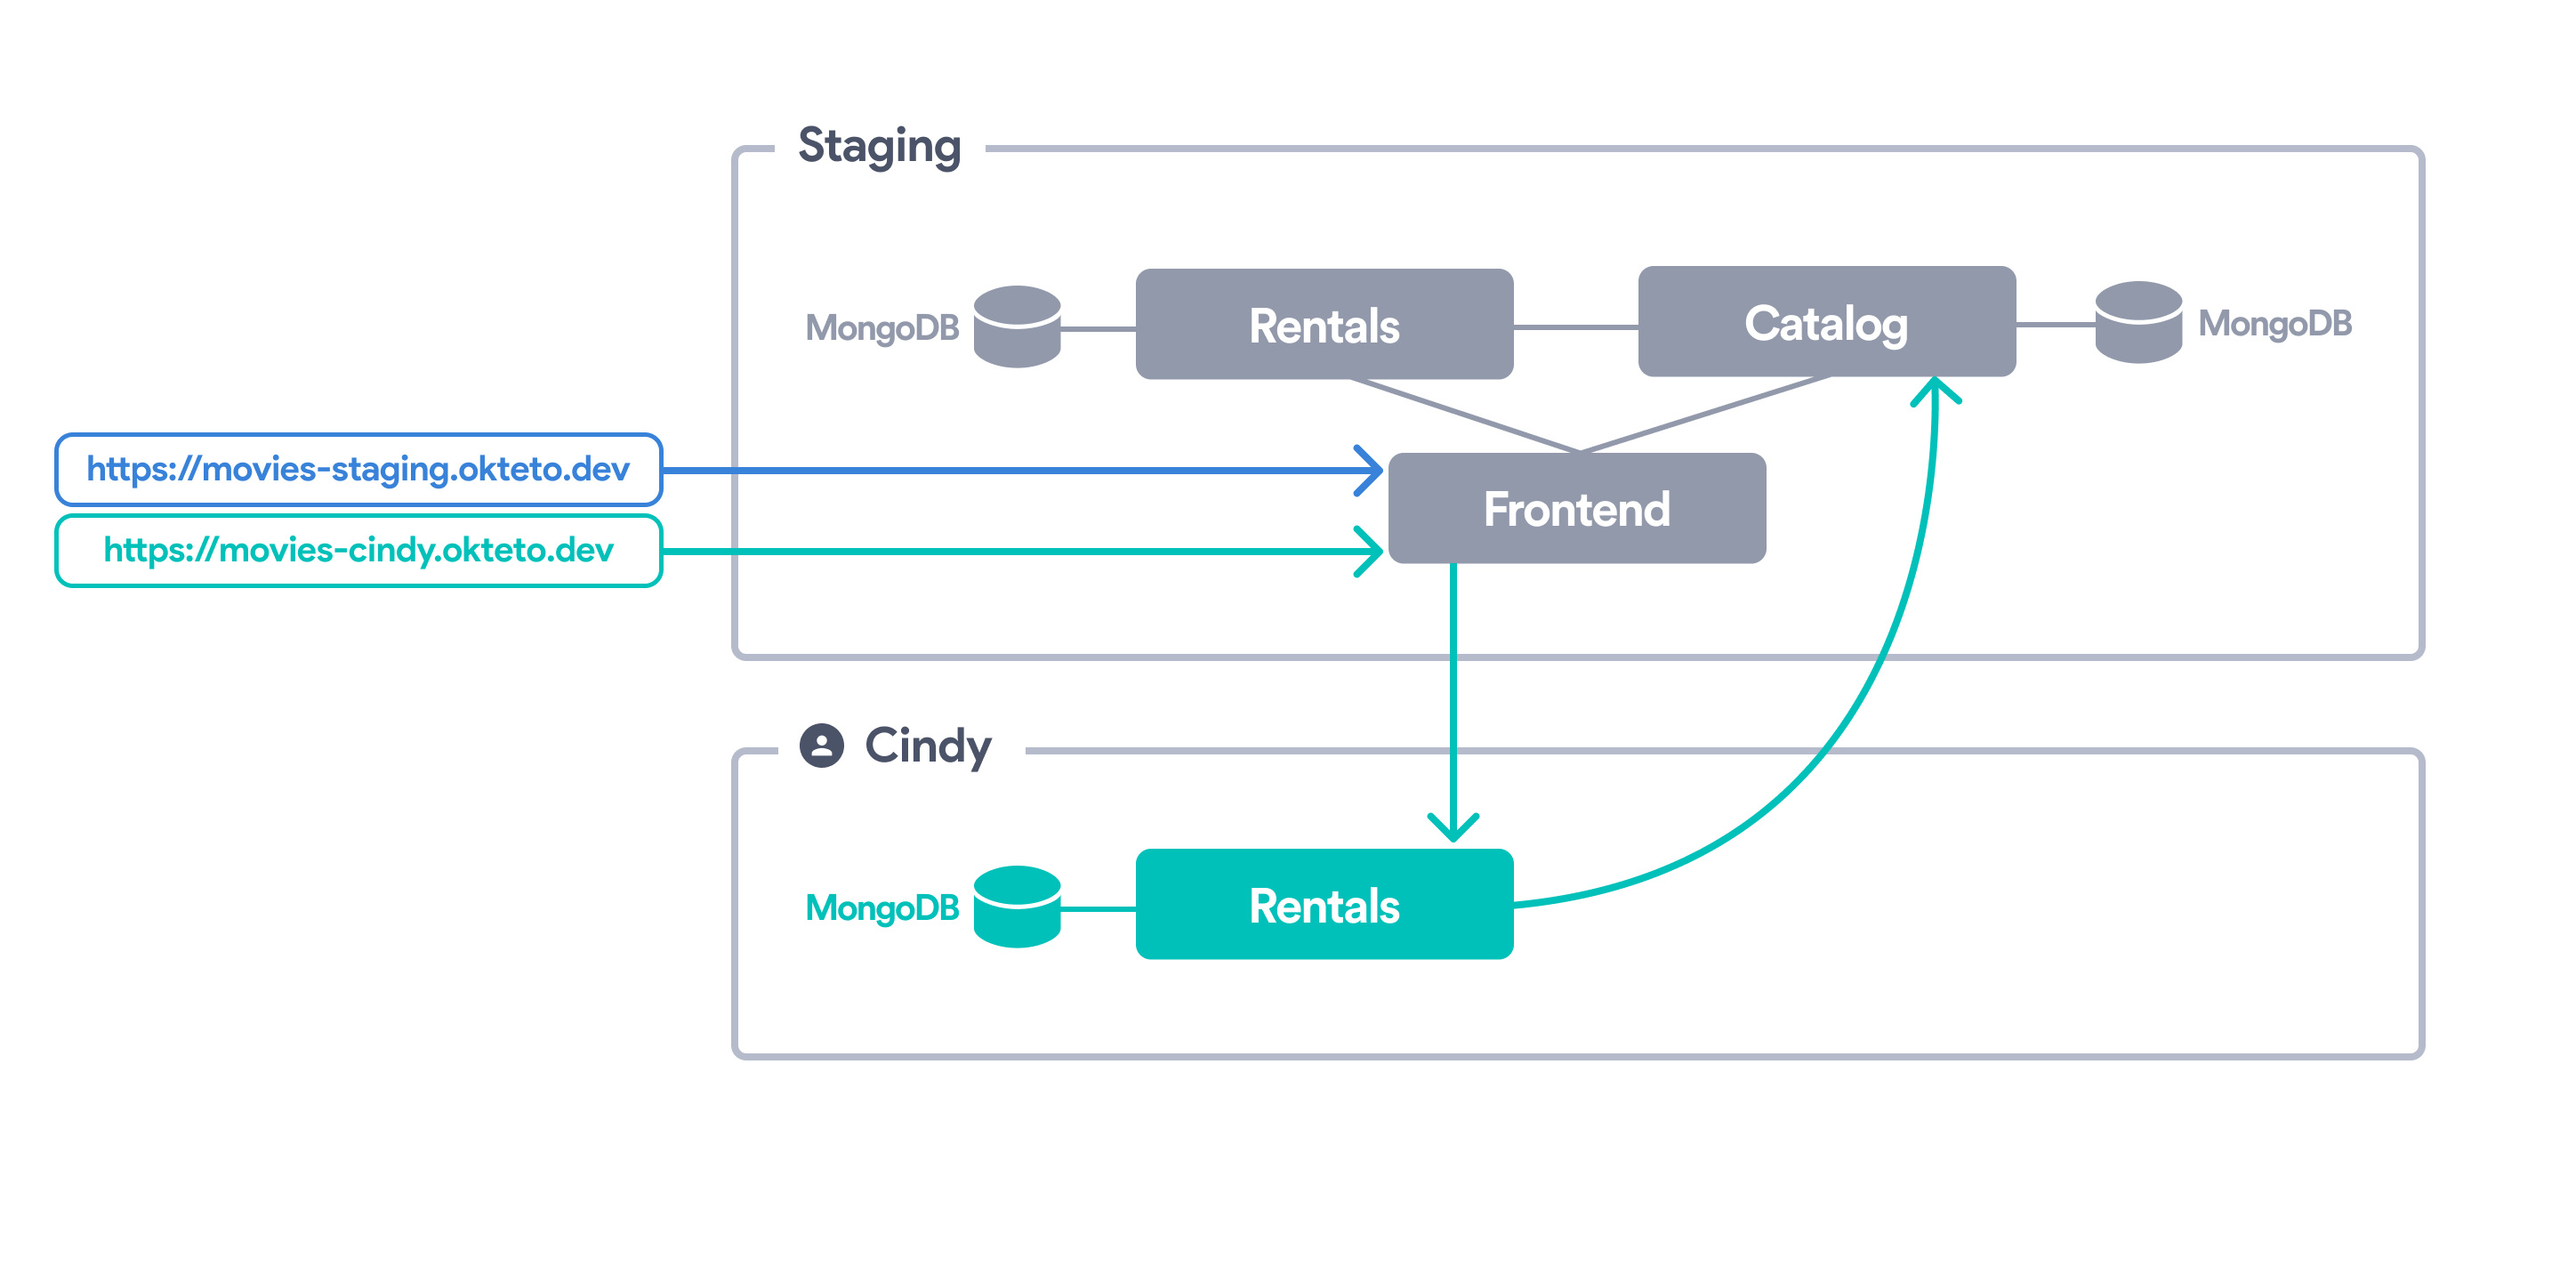
Now, let's interact with your diverted application. To try the application, click on the endpoint of the frontend service (e.g. https://movies-cindy.okteto.example.com). Thanks to divert, you can seamlessly interact with the entire application, even though you have only deployed one service.
If you remember, we rented a few movies in Step 1 of the tutorial. Now check out the version deployed on your Personal Namespace. Notice that the movies rented are different than the ones in staging? This is because Okteto is using your copy of the rental service, including the database. Any changes you make to that service (including synchronizing your code via okteto up) will only impact the services deployed on your Namespace.
When using Divert, Okteto will use the hostname of the endpoint to route things accordingly. In this example, a request to https://movies-staging.okteto.example.com will only use the staging services, while a request to https://movies-cindy.okteto.example.com will go to your Namespace first, and if the service is not there, then it will fallback to the shared Namespace.
Next steps
Congratulations, you just deployed your first diverted Development Environment 🚀
Diverted Development Environments are compatible with the rest of Okteto's features. Head over to our getting started guides to learn how to configure Okteto for live-updating applications with different programming languages and debugging tools.